Airplay with Raspberry Pi
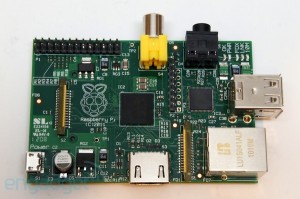 I bought a Raspberry Pi this week. For those who don’t know this is a tiny ARM-based computer, the size of a credit card, which is supplied as a board without case, power supply or mass storage, for £30 (delivered). It’s been in the media and is being described as a universally affordable spiritual successor to the popular 1980s BBC Micro, as it has been designed with the purpose of teaching school kids how to program computers in mind.
It ships with 256Mb of RAM, an SD card slot, two USB ports, an ethernet port and an HDMI port. It’s powered via micro-USB and so will work with any micro-USB cable (and therefore many phone chargers). You then have to add a SD card for mass storage, onto which the operating system is installed. You then also need to connect it to an HDMI display and plug in a USB keyboard. You can easily spend as much as the original purchase price again on accessories, but that still doesn’t make it expensive.
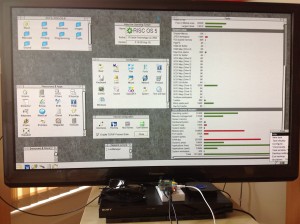
The primary intention of its manufacturers is for it to run a special Linux distribution called Raspbian, which is based on Debian, but it is by no means limited to this. In theory it can run anything that’s compiled for the ARM architecture, although in practise this is different. Already a group is working on a port of Android, an obvious choice, since this operating system is designed for ARM-based smartphones and tablets. Someone has even made a RISC OS 5 distribution available (RISC OS 5 is the older fork of RISC OS which was open-sourced, RISC OS 6 remains a commercial product and is not available in the same way). This gave me a few hours of delightful nostalgia as I lived and breathed RISC OS for 5 years back in the early 1990s. I’m hoping I’m going to be able to use it to recover some of my old files and convert them to PDF.
But this isn’t the real reason why I’ve bought my Raspberry Pi. Nor have I bought it, as many will, just to dick about with it. Unlike some others I don’t have any grand delusions that it will replace either my desktop computer or my home server, because it’s frankly not up to either task. Its low cost and the fact that you can run it off a USB port means that it’s actually rather slow, but that’s fine, it’s not designed as nor was it ever meant to be a fast computer. But it is small, cheap and perfect for what I want to use it for.
Alternative Airplay device
Airplay is the system through which Apple devices can play music through remote speakers connected to devices on the local network. These can be Apple TVs or an Airport Express. The Apple TV represents great value at £99, but the Airport Express is less so at £80, which is an increase on the previous price since they brought out the new model. Most people already have a wireless network and so £80 just to connect your stereo to your network is a little steep if you don’t need the wireless features of an Airport Express.
Here’s how the budget stacks up: Raspberry Pi is £29.95 delivered from Farnell. On top of that you’ll need an SD card (£3.38 delivered from Play.com), a case (various options on eBay, I found one for £4.23 delivered), and if you don’t have a spare already then a micro-USB charge (£2.40 delivered from Play.com). This all comes to £40.00 delivered, exactly half the cost of an Airport Express.
You will also need an audio cable and an ethernet cable but I’m not including these in the budget since neither is not included with an Airport Express. What I would point out, however, is that the Raspberry Pi solution is not a wireless solution without the addition of a USB wireless dongle, themselves no more than a fiver from eBay.
Instructions
- Install Raspbian. You can do this using one of the pre-built images if you want, but if you’re capable I recommend that you install it using the network installer so you can control what goes on and it uses as little space as possible (you will however find this method much slower). You’ll need at least a 2Gb SD card for either method. I tried to shoehorn an install on a 1Gb card by removing the swap partition, but it didn’t boot. You need only the default options if using the network installer, no extras required.
- I recommend that you update the firmware and the operating system (using aptitude) at this point. There have been some recent improvements to the firmware which bring performance increases and better wireless support.
- Log in as root and run the following commands:
- Add these lines to /etc/rc.local. The second line forces the audio through the 3.5mm jack rather than the HDMI port. If for some reason you require the latter then omit the second line.
modprobe snd_bcm2835
amixer cset numid=3 1
- Change this line in /etc/init.d/shairport, starting DAEMON_ARGS, so that it reads the following (you can change “Raspberry-Pi” to a string of your choice):
DAEMON_ARGS="-w $PIDFILE -a Raspberry-Pi"
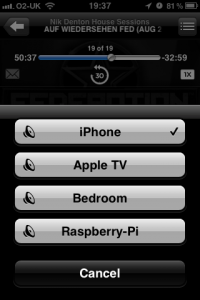 Reboot, and you should now see a new entry in your Airplay menu on your device. At this point my SD card was using 783Mb on its root partition. I’ve made an image of this with a view to making it available for download, but even compressed it came out at 658Mb and I pay for my bandwidth by the Gb, so I won’t be uploading it, not when the instructions are so easy.
I would note that if you are geeky enough to achieve this then think twice before building them for your friends in order to save them a few quid. If you build and supply it you will have to support it, and you won’t have the option of sending them to the Apple Store should it go wrong. I speak as a reluctant Apple help desk for many of my friends and family; certainly I will not be making any of these little rods for my own back for anyone who can’t do it themselves :)
Portable wireless boombox
Despite this little triumph I actually don’t require an Airplay device at the moment. I have two already and no requirement for a third, so while this is useful it’s not especially useful for me as a home device at this time. What I want to do is take this project further and build a portable wireless boombox.
This would be a self-contained system which doesn’t depend on anything other than a 12 volt power source (so, car battery, boat, caravan, solar panels, mains adaptor or a collection of D-cell batteries). It would provide its own wireless network to which users can connect their Airplay devices and then use wirelessly. It would contain a small power amplifier and a pair of speakers. I’ve found a power amplifier that even has a USB port from which I can power the Raspberry Pi, saving me having to worry about a step-down from 12 volts to 5 volts.
Not intended for connection to an existing wireless infrastructure this would mean that it could be used anywhere, as long as there’s a 12 volt power source. Great for camping, barbecues, boats, festivals or simply down at the bottom of the garden. I’ve identified the parts that I will need (and indeed ordered most of them), but my biggest challenge still remains and that is what sort of box to build to house them and how to manufacture it. I’ve a feeling that my prototype won’t be particularly pretty, if entirely functional.
I’ll keep you posted on this project as I make progress.
