Uncategorized

Third Mac mini

So, after four and a half years of solid service from my second Mac mini (a 2.53Ghz Core 2 Duo polycarbonate), which followed three and a half years of solid service from my first Mac mini (a 1.5Ghz Core Solo polycarbonate), I now have a third. It’s an aluminium unibody Intel Core i7 (2.7Ghz) and I’ve pimped it out with 16Gb of RAM and a 512Gb SSD, which will make it perform as fast as it will ever go. It’s quite a departure from its predecessor in terms of speed and usability.

Screen Shot 2014-06-24 at 22.24.02

I was going to splash out on a new iMac, but something stopped me at the last minute (most likely the imagined image of the credit card bill arriving) and then the opportunity to acquire this Mac mini presented itself, so I’ve saved myself a fair whack of cash. I’m still running it on the two 1600×1200 20″ monitors I bought ten years ago, which, because I spent rather a lot of money on them in 2004, simply refuse to die because they’re very good quality. The purchase of an iMac would have made these old faithfuls unnecessary redundant. The only real feature I’ve sacrificed in not buying the iMac is an up-to-date graphics card, which would have been nice, but an extravagant indulgence given how often I actually play demanding games.

This Mac mini should last me at least until the end of 2016 at which point I will consider my options again. I expect the monitors will probably last until then too, at which point they’ll be even more old fashioned but even harder to retire due to my irrational loyalty to their continued enduring service.

In other news I now have a Windows PC on my desk at work. This is the only statement I’m willing to make about it.

Uncategorized

Home energy monitor reveals consumption horrors

I’ve moved flat recently (all planned, fancied an upgrade and the right opportunity came along), and my new flat is situated close to to the cupboard on my floor where the electricity meters are kept. This differs from previous apartment buildings in which I have lived because in those buildings the meters were all in the basement, far far away from the apartment itself. This prevented me from using an energy monitor, because for them to work you need to install a transmitter on the meter and that transmitter needs to be within a certain distance of the receiver inside the apartment.

Keen to work out why I kept getting over usage bills from my own employer, I bought an Owl Intuition-E and Micro+ bundle, which gave me the transmitter, the receiver and a network receiver, which allows me to upload usage data over the Internet to their online portal for analysis. Being within 30 metres of the meter, it works a treat.

I was a little surprised, however, with the results it gave me. I’ve found out the following:

  1. My television, surround sound and Bluray setup in the living room uses 60W on standby. 525 kWh per year (£78.75). I put a remote controlled socket on that lot straight away. I have no idea why 60W is necessary to keep four items AV equipment on standby.
  2. The TV / stereo setup in the bedroom uses 16W on standby. Another 140 kWh per year (£21.00) saved with another remote socket.
  3. I use a minimum of 241W. It never goes below that. This is during the day with no lights on (not that they bother me much, they’re all LED), with the fridge/freezer on (60W), my server and networking gear on (90W – this is lean, trust me) and my desktop computer on (60W), but with my monitors and everything else switched off. This means that there’s still 31W of background usage, 24 hours per day (271 kWh per year, £40.73).
  4. Consumption has been as high as > 9kW. This, presumably, was when I had the water heater and the cooker and the microwave and the telly on at the same time. Fortunately periods like this are always short-lived.

It’s a really good product, works very well, but I absolutely hate the web portal you have to log in to view your statistics. It’s awful. Fortunately, the network device can be configured to also sends its readings to a specified IP address on a specified UDP port, which is exactly what I’ve done and I store all my readings in a local database with a collector listening on that port. I then wrote my own software to analyse it and now I get a report like this every day. To this I have also added a web browser dashboard.

daily-electricity-report

Update 19/05/2014: I’ve now created a web dashboard (which also works well on mobile devices).

Screen Shot 2014-05-19 at 20.03.27

Code’s here if you’re interested (NodeMon isn’t really a thing, just a project framework for various bits of tinkering). Needs Phalcon.

Uncategorized

Where is my iPhone Mini?

I’ve been an iPhone user and fan ever since the original iPhone came out and I’ve used one for the past four and a half years. I had the original iPhone, the 3G, the 3GS and then I skipped a couple of models and now have an iPhone 5. I’ve smashed the screen, obviously, by dropping a dumbbell onto it, but it seems unfashionable to have an iPhone with an intact screen these days and the dumbbell thing* gives me man points.

Smashed screen aside, the iPhone 5 is a very capable smartphone. However, I’m at the point with it where I believe it is in fact too capable I’m struggling to justify ownership of it. I find that I actually use very little of what it has to offer. I use the phone, obviously, text messages, e-mail, Facebook, Twitter, Foursquare, Maps, Camera, iPod occasionally*, National Rail enquiries and a handful of other apps on an occasional basis. Although my old 3GS was slow, there was none of this that it couldn’t do and there is nothing I use my iPhone 5 for now that I didn’t use to use my 3GS for (with the exception of the camera, I didn’t used to use that on the 3GS because it was properly awful). I use mobile apps on my iPad much, much more than I do on my smartphone; my iPad is where I need the mobile computing power and features.

My point is that I’m paying for (£45 per month on a lease) and carrying around this massive overpowered pocket computer with me everywhere I go, with its fragile screen, poor battery life and a relatively high chance that I’ll get mugged for it one day, when I barely use its capabilities. When Apple launched the iPad Mini earlier this year I had very high hopes that they would follow suit with a smaller iPhone, the iPhone Mini, or whatever; a device which isn’t as powerful as a full-blown iPhone but is smaller, has a better battery life and can do the basics like make phone calls, text messages, basic social media apps, iPod, a reasonable (if not overly fancy) camera, etc.

My hope was that they would base it on the iPod Nano:

ipod-nano

This device has a small colour multitouch screen with an iOS-like interface which is clearly capable of handling a form of application selection. I cannot imagine how it would be hard to include the necessary electronics for a mobile phone and wifi into a package this size, even if it had to be slightly thicker perhaps than a plain iPod Nano (in the same way that the iPod Touch is thinner than the iPhone). It would have been perfect for me, so I got quite excited when I saw the rumours about the iPhone 5C – perhaps the “C” stands for “compact”?

But no.

The iPhone 5C is nothing more than a re-packaged iPhone 5, except they’re making it out plastic, which will arguably be more robust, but is actually a decision that has mainly been made for cost-reduction purposes. Despite this, the 5C is by no means a bargain, offering a saving of just £80 over the even more powerful and even more expensive flagship iPhone 5S, which they have introduced to replace the iPhone 5. The top of the range 64Gb model costs more than an eye-watering £700.

They’ve missed a beat here. I’m not normally underwhelmed by Apple launches (although I am by no means a frothing fanboy before, during or after them), but this one may as well have never happened.

* I have, incidentally, eliminated the possibility of future dumbbell related screen smashes with the purchase of an iPod Shuffle for use in the gym. It’s not possible to smash the screen on this because it does not have one.

Uncategorized

A very Angular learning curve

Recently my team at work have been working with Angular JS, a Javascript framework created, used and published by Google. We’ve used it extensively in our new website, which is created from static HTML and Javascript files with no server-side page generation. All the work is done by the browser and user interaction is processed using a REST API.

AngularJS-large

I didn’t actually do any of the coding on the website and so I did not have the opportunity to learn how to use Angular JS during the project as the rest of my team did, so in order that I did not fall behind on the skill I decided to learn it myself in my own time by creating a web-based tool which creates DHCPd configuration files. The application is boring (although actually useful if you run such a server), but that’s not the point, it was a learning exercise.

Angular JS has a bit of a learning curve. It works in different ways to other Javascript libraries and frameworks and it takes a while when you’ve started from scratch to “think Angular”, rather than in ways in which you may have become accustomed with things like jQuery, itself revolutionary in the world of Javascript, but Angular takes it to a whole new level. Once you are “thinking Angular” things become much clearer and easier and you find yourself in a very natural-feeling flow.

I’ve made the exercise available on Github. You may find the tool itself useful if you’re a system administrator, but if you’re a developer it’s more likely the demonstration of a simple Angular application that you will probably see more value in.

I have some larger extra-curricular projects around the corner which I intend to base on Angular JS and expand my knowledge. We’ll also continue to use it at work and will almost certainly use it when it comes to re-implementing the user interface of the company’s internal browser-based management system.

Uncategorized

MRTG Dashboard

I’m one of those die-hards whose been using MRTG for almost as long as I’ve had a computer with a network connection. It’s an old tool for monitoring network traffic and its not pretty by modern standards but it does still do that job very well. However, its blocky output does rather leave much to be desired in this day and age of interactivity and so I’ve knocked together an MRTG Dashboard.

It’s a single PHP script which you just pop in your MRTG output directory (workdir) on your PHP-enabled web server. That’s all you need, all the required libraries are loaded from CDNs. It’s not perfect, but it is an improvement.

MRTG Dashboard screenshot

MRTG Dashboard screenshot

You will find that the timescales on the interactive graphs can be a little hit-and-miss. This is because while Highcharts demands data at consistent intervals when creating time-based graphs MRTG’s data is anything but consistently intervalled. I will try to improve this at some point in the future.

You can get MRTG Dashboard from Github.

Uncategorized

Driven to drop Google Drive for Dropbox

Cloud computing is a wonderful thing, whether you are a business or a consumer. It isn’t the answer to everything, but it’s certainly solved some common problems, not least of which is the issue of back-ups. These days for a few dollars per month everybody can transparently back-up most if not all their important files to servers on the Internet and have those files synchronised between multiple computers and mobile devices such as smartphones and tablets.

There’s also no shortage of companies willing to offer their cloud storage services. Some services, like Amazon’s S3 service, are geared towards developers for integration into software (although Amazon now have a consumer offering), but there are many aimed at consumers who want a simple way of achieving transparent backup of their personal files. Microsoft, Symantec and Google all offer solutions, although not all are cross-platform.

Google Drive

Up until last week I used Google Drive, having taken up the service since it was launched earlier in the year. It costs $4.99 per month for 100Gb of storage and comes with software which you install on your computer and it automatically manages the sychronisation of your files, so long as you save them in the special “Google Drive” directory.

However, Google Drive was not without its problems from the very start. The software is not particularly well written and it is apparent that it has some bugs. It suffers from massive memory management problems and is prone to crashing without warning. This was especially annoying during my initial upload of files, which would have taken around a week if the software had remained running, but it did not and it would quit every few hours. Because I was either not awake or not at home to keep restarting it each time it crashed, my initial upload took far longer.

But it got there in the end, and for around six months it successfully kept my files safe and sychronised between my computers. I still had the memory issues (it typically used between 700Mb and 1Gb of RAM even when idle), and so I often found myself having to quit the software in order to free up some RAM if I needed it. This wasn’t ideal as it meant that I had to remember to restart Google Drive in order to ensure my files were kept up to date, but I lived with it.

Restoration test

Then, at the end of November, came a real test of the value of Google Drive. The hard disk in my desktop Mac Mini developed unrecoverable hardware problems, and I had to replace it. Although this was a time-consuming process it was not a disaster for me as I had all my important data in one cloud service or another. I have all my music on iTunes Match, all my development work on Github and all other files that I would be upset about losing in Google Drive. I have other files that aren’t on any cloud service stored on an external hard drive; these are files that could be replaced relatively easily if I had to and it’s not worth backing them up.

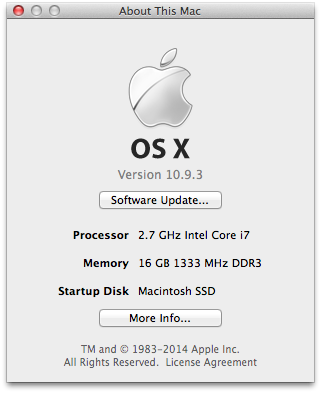
So I merrily removed the old hard disk without attempting to remove any of my data from it and installed the new one in its place (putty knives and swearing is always involved when upgrading an old-shape Mac Mini). I installed the operating system from scratch and all my software on the new hard disk and then began the process of restoring my data from the various cloud services. Github and iTunes Match worked like a charm straight off the bat, but Google Drive was, unfortunately, an entirely different story.

I installed the latest version of the software and entered my Google account details. It thought about it for a bit, allocated itself a whopping 3.25Gb of RAM, and then started to download my files. “OK”, I thought, “the RAM thing is even more annoying than it was before, but whatever”, and left it to do its thing. After downloading around 700Mb, it displayed a window saying that “An unknown issue occurred and Google Drive needs to quit“. The window also said that if this happens repeatedly I should disconnect my account.

It did this seven further times. Each time I was able to download around 100Mb of data before it displayed this error again. After the seventh time it didn’t download any more data, no matter how many more times I ran it. It had only downloaded 1.3Gb of my 55Gb of data. So I tried disconnecting my account and logging-in again. It insisted on starting the download from scratch, forcing me to discard the 1.3Gb already downloaded. Unfortunately it did exactly the same thing, repeated errors and then “maxing-out” at around 1.3Gb of files after numerous restarts. It was, frankly, ridiculous.

Out of frustration I called upon Google’s support, which as a paying customer I was entitled to. Their suggestion was to uninstall and re-install the software, and this suggestion came 48 hours later. Needless to say I was not particularly impressed. I did not believe for a second that this would fix the problem and that I was simply being taken through a standard support script. This was the final straw with Google Drive, after all the upload issues, memory issues and now this, an apparent inability to restore from my precious backup when I needed to.

I am 99% sure that it was crashing due to poor memory management (i.e. it was running out of memory), if the console messages were anything to go by. I considered that following their reinstallation advice would be a waste of my time based on this and I would further waste my time attempting to explain my technical suspicions to them. I needed my files back and I needed my cloud service back, on my timescale and not on Google’s.

Dropbox

I am fortunate to own two computers, and this was my saving grace. I still had the copy of the Google Drive directory on my other computer, so I still had a local and up to date copy of all my files. If, however, I had only one computer, I would have been entirely at the mercy of Google to get my files back. That was not something that I decided I was comfortable with and so I decided I had two choices:

  1. Persevere with Google’s support and, assuming they manage to fix the issue, continue to tolerate their piss-poor software going forward.
  2. Use the other copy of my files I had, find an alternative cloud storage service, upload them to it, and dump Google Drive.

I chose the latter. I had heard good things about Dropbox. They are a small firm for whom online storage is their entire business, rather than just another product, which is the case for Google. It is absolutely in their interest to get their offering right, because if they don’t they don’t have a dominant global search engine business (for example) to fall back upon. I wouldn’t be surprised if Google Drive grew half-arsed out of project that a Google developer created on his “do your own thing” day of the week, a privilege extended to Google developers as standard, to the envy of most others.

Dropbox is twice the price of Google Drive, costing $9.99 per month for 100Gb instead of $4.99. This isn’t a high price to pay for a reliable solution in my opinion. Like Google Drive, it too comes with software to be installed on your computer(s) which creates a special directory into which you save your files and it sits there in the background and uploads and downloads files as required. The difference between the Dropbox software and the Google Drive software is that the Dropbox software does so without using all your RAM and without quitting every few hours. Amazeballs!

It took around 7 days to upload my files to Dropbox, during which the software did not crash even once and used no more than 400Mb of RAM at its peak. Google Drive’s memory management was so poor that it never released memory if it didn’t need it any more; its RAM usage just kept going up and up and up. I was supremely impressed with this; this is how Google Drive should have been from the very beginning and the fact that Dropbox can do it means there is no excuse for Google Drive not to be able to. I am currently in the process of downloading these newly-uploaded files to my other computer en-masse, and guess what, still no crashes and it doesn’t seem to think that downloading 55Gb is a somehow insurmountable task, so doesn’t give up after the first 1.3Gb.

Other things I like about Dropbox:

  1. Great mobile app for iPhone and and iPad. This, too, Just Works, and allows viewing of a wide range of file types. It also backs up the camera photos from each device, which is a nice touch.
  2. It has an API, which allows it to be integrated into other software and services, such as IFTTT. This is more exciting for me than it probably would be for most people, but it’s something that Google Drive doesn’t have.

Of course, Dropbox may well not be without its own problems which are not yet apparent. If any transpire I will of course report on them, but initial tests and use of the service is very promising, and certainly far better than comparable early days with Google Drive.

So there you are. If you’re looking for advice on which cloud backup service to use, I recommend Dropbox. It’s compatible with Mac OS, Linux, Microsoft Windows, iOS (iPhone, iPad) and Android. Enjoy.

Uncategorized

Airplay with Raspberry Pi

I bought a Raspberry Pi this week. For those who don’t know this is a tiny ARM-based computer, the size of a credit card, which is supplied as a board without case, power supply or mass storage, for £30 (delivered). It’s been in the media and is being described as a universally affordable spiritual successor to the popular 1980s BBC Micro, as it has been designed with the purpose of teaching school kids how to program computers in mind.

It ships with 256Mb of RAM, an SD card slot, two USB ports, an ethernet port and an HDMI port. It’s powered via micro-USB and so will work with any micro-USB cable (and therefore many phone chargers). You then have to add a SD card for mass storage, onto which the operating system is installed. You then also need to connect it to an HDMI display and plug in a USB keyboard. You can easily spend as much as the original purchase price again on accessories, but that still doesn’t make it expensive.

Raspberry Pi running RISC OS 5

The primary intention of its manufacturers is for it to run a special Linux distribution called Raspbian, which is based on Debian, but it is by no means limited to this. In theory it can run anything that’s compiled for the ARM architecture, although in practise this is different. Already a group is working on a port of Android, an obvious choice, since this operating system is designed for ARM-based smartphones and tablets. Someone has even made a RISC OS 5 distribution available (RISC OS 5 is the older fork of RISC OS which was open-sourced, RISC OS 6 remains a commercial product and is not available in the same way). This gave me a few hours of delightful nostalgia as I lived and breathed RISC OS for 5 years back in the early 1990s. I’m hoping I’m going to be able to use it to recover some of my old files and convert them to PDF.

But this isn’t the real reason why I’ve bought my Raspberry Pi. Nor have I bought it, as many will, just to dick about with it. Unlike some others I don’t have any grand delusions that it will replace either my desktop computer or my home server, because it’s frankly not up to either task. Its low cost and the fact that you can run it off a USB port means that it’s actually rather slow, but that’s fine, it’s not designed as nor was it ever meant to be a fast computer. But it is small, cheap and perfect for what I want to use it for.

Alternative Airplay device

Airplay is the system through which Apple devices can play music through remote speakers connected to devices on the local network. These can be Apple TVs or an Airport Express. The Apple TV represents great value at £99, but the Airport Express is less so at £80, which is an increase on the previous price since they brought out the new model. Most people already have a wireless network and so £80 just to connect your stereo to your network is a little steep if you don’t need the wireless features of an Airport Express.

Here’s how the budget stacks up: Raspberry Pi is £29.95 delivered from Farnell. On top of that you’ll need an SD card (£3.38 delivered from Play.com), a case (various options on eBay, I found one for £4.23 delivered), and if you don’t have a spare already then a micro-USB charge (£2.40 delivered from Play.com). This all comes to £40.00 delivered, exactly half the cost of an Airport Express.

You will also need an audio cable and an ethernet cable but I’m not including these in the budget since neither is not included with an Airport Express. What I would point out, however, is that the Raspberry Pi solution is not a wireless solution without the addition of a USB wireless dongle, themselves no more than a fiver from eBay.

Instructions

  1. Install Raspbian. You can do this using one of the pre-built images if you want, but if you’re capable I recommend that you install it using the network installer so you can control what goes on and it uses as little space as possible (you will however find this method much slower). You’ll need at least a 2Gb SD card for either method. I tried to shoehorn an install on a 1Gb card by removing the swap partition, but it didn’t boot. You need only the default options if using the network installer, no extras required.
  2. I recommend that you update the firmware and the operating system (using aptitude) at this point. There have been some recent improvements to the firmware which bring performance increases and better wireless support.
  3. Log in as root and run the following commands:

  1. Add these lines to /etc/rc.local. The second line forces the audio through the 3.5mm jack rather than the HDMI port. If for some reason you require the latter then omit the second line.
modprobe snd_bcm2835
amixer cset numid=3 1
  1. Change this line in /etc/init.d/shairport, starting DAEMON_ARGS, so that it reads the following (you can change “Raspberry-Pi” to a string of your choice):
DAEMON_ARGS="-w $PIDFILE -a Raspberry-Pi"

Reboot, and you should now see a new entry in your Airplay menu on your device. At this point my SD card was using 783Mb on its root partition. I’ve made an image of this with a view to making it available for download, but even compressed it came out at 658Mb and I pay for my bandwidth by the Gb, so I won’t be uploading it, not when the instructions are so easy.

I would note that if you are geeky enough to achieve this then think twice before building them for your friends in order to save them a few quid. If you build and supply it you will have to support it, and you won’t have the option of sending them to the Apple Store should it go wrong. I speak as a reluctant Apple help desk for many of my friends and family; certainly I will not be making any of these little rods for my own back for anyone who can’t do it themselves :)

Portable wireless boombox

Despite this little triumph I actually don’t require an Airplay device at the moment. I have two already and no requirement for a third, so while this is useful it’s not especially useful for me as a home device at this time. What I want to do is take this project further and build a portable wireless boombox.

This would be a self-contained system which doesn’t depend on anything other than a 12 volt power source (so, car battery, boat, caravan, solar panels, mains adaptor or a collection of D-cell batteries). It would provide its own wireless network to which users can connect their Airplay devices and then use wirelessly. It would contain a small power amplifier and a pair of speakers. I’ve found a power amplifier that even has a USB port from which I can power the Raspberry Pi, saving me having to worry about a step-down from 12 volts to 5 volts.

Not intended for connection to an existing wireless infrastructure this would mean that it could be used anywhere, as long as there’s a 12 volt power source. Great for camping, barbecues, boats, festivals or simply down at the bottom of the garden. I’ve identified the parts that I will need (and indeed ordered most of them), but my biggest challenge still remains and that is what sort of box to build to house them and how to manufacture it. I’ve a feeling that my prototype won’t be particularly pretty, if entirely functional.

I’ll keep you posted on this project as I make progress.

Uncategorized

Mac, Apache, MySQL and PHP (MAMP)

Mac OS X serves as an excellent development environment, even if you are not actually developing Mac OS or iOS applications. It is the darling of many a LAMP (Linux, Apache, MySQL and PHP) developer, who enjoys a slick desktop operating system with good UNIX-like underpinnings but who don’t necessarily want to put up with all the various limitations and complications that running a Linux desktop brings, consistent improvements in this regard over recent years notwithstanding.

The only trouble with this is that if you want to develop LAMP applications and work on a Mac then traditionally you’ve needed a two-box setup; a Mac on your desk and Linux on a development server. For many this isn’t an issue, and indeed when you’ve got a team of developers, optimal, but what if you wanted a self-contained development environment that was restricted to just one box? What if you wanted that box to be your laptop so you could take it anywhere?

Solutions

“Virtual machine!”, I hear you cry. Yes, this is a possible solution, and for many works well. Good virtualisation software is free these days, but using a local VM is cumbersome. Not only does it consume a large slice of your RAM but it also puts a lot of strain on the CPU, meaning that if you are running off your battery your battery life will be decreased. It’s also cumbersome; you have to start up the VM when you need it and there can be complications with the networking, for example, if you have connected to a public wireless network it’s possible that your VM might not be extended the same resource.

There is a software package for Mac OS called MAMP (the M for Mac OS replacing the L for Linux). This is a point-and-click installer which bundles Apache, Linux and PHP for installation on Mac OS. I don’t like this solution, for a number of reasons, including:

  1. Limited functionality unless you “go pro” (at quite considerable cost). Any self-respecting developer will require multiple virtual hosts as a minimum and won’t need or want a clicky-button interface to get what they want.
  2. You are entirely at the mercy of the distributors of MAMP with regards to component software versions that are made available to you and when.

Alternative solution

There’s an alternative to this. You don’t have to fork out £39 for a package of what it otherwise freely and widely available software. With the help of my friend and colleague Ben Nimmo I present the following assembled and tested instructions for turning your Mac into a native MAMP server without using the packages download.

MySQL

  1. Download and install the latest .dmg and install both the *.pkgs within it (don’t use the TAR/GZ archives). You may wish to install the Workbench too, it’s really good these days.
  2. Find where the mysql.sock file is expected to be in /etc/php.ini (should be /var/mysql/mysql.sock)
  3. Create the folder and link the socket file to the expected location.
sudo mkdir /var/mysql
sudo ln -s /private/tmp/mysql.sock /var/mysql/mysql.sock
  1. Add MySQL to command line by editing /Users/username/.bash_profile and adding this line and then either restarting terminal or source-ing the file:
export PATH=$PATH:/usr/local/mysql/bin

PHP

PHP comes with Mac OS, so it’s not necessary to download and install it, however, there are a couple of necessary steps to configure it:

  1. Copy the default php.ini file:
sudo cp /etc/php.ini.default to /etc/php.ini
  1. Edit /etc/php.ini and uncomment this line to enable xdebug (not essential, but recommended):
zend_extension="/usr/lib/php/extensions/no-debug-non-zts-20090626/xdebug.so"

Apache

Apache too comes with Mac OS, so again, no need to download and install it. Its configuration, however, is a little more complex, but nothing scary. The described configuration will provide a special Apache “sandbox” environment for your projects. It uses the existing “Sites” directory in your Mac OS home directory.

  1. Create a subdirectory in this directory for each of your projects, ensuring that the directory name does not contain any characters that would be illegal in a URL. Within each of these subdirectories create another subdirectory called “web”; this will be become the web root of each project. The extra subdirectory is in case you wish to use a framework in your projects which may keep some of its files outside of the web server root (Symfony is a good example of this).
  2. Create a subdirectory called “logs” in your “Sites” directory; Apache will maintain two log files, access and error, for all the sandbox sites.
  3. Enable PHP5 with Apache by editing /etc/apache2/httpd.conf and uncomment the following line:
LoadModule php5_module libexec/apache2/libphp5.so
  1. Change the user and group to your username and “staff” respectively, also in /etc/apache2/httpd.conf:
User sbf
Group staff
  1. While still in /etc/apache2/httpd.conf, find the following configuration and change “Deny from all” to “Allow from all”:
<Directory />
    Options FollowSymLinks
    AllowOverride None
    Order deny,allow
    Deny from all
</Directory>
  1. Create and edit /etc/apache/users/user.conf with the following, changing “sbf” to the username:
<VirtualHost *:80>

    ServerName dev.local
    DocumentRoot /Users/sbf/Sites/

    RewriteEngine on
    RewriteLogLevel 1
    RewriteLog /var/log/apache2/rewrite.log

    # sites in the format http://[site].dev.local
    RewriteCond %{HTTP_HOST} ^[^.]+\.dev\.local
    RewriteCond %{REQUEST_URI} !^/error/.*
    RewriteCond %{REQUEST_URI} !^/icons/.*
    RewriteRule ^(.+) %{HTTP_HOST}$1 [C]
    RewriteRule ^([^.]+)\.dev\.local/(.*) /Users/sbf/Sites/$1/web/$2

    # Logging
    CustomLog /Users/sbf/Sites/logs/sandbox.access.log combined
    ErrorLog /Users/sbf/Sites/logs/sandbox.error.log

</VirtualHost>
  1. Restart Apache:
sudo apachectl restart

Then, for each of your sites, add an entry in /etc/hosts for with the format “name.dev.local” pointing to 127.0.0.1, where name corresponds to a subdirectory in your “Sites” directory. Don’t forget that the public subdirectory of each site is assumed to be “web”, so make a symlink to this if the framework you use has a different convention.

You should then be able to access each of your sites from URLs using the convention http://name.dev.local/ – where “name” again is a subdirectory within your “Sites” directory.

I’ve tested this setup procedure and It Works For Me [tm]. If, however, it doesn’t quite work for you as described, please let me know where you’re going wrong and how, if you were able, to resolve it, and I will update these instructions accordingly.

1 2 3 4 22